Bobtail Discovery Dashboard Part 1 |
|
|
In 2020 I decided to update the dashboard of my bobtail Discovery to make it tidier and add more features.
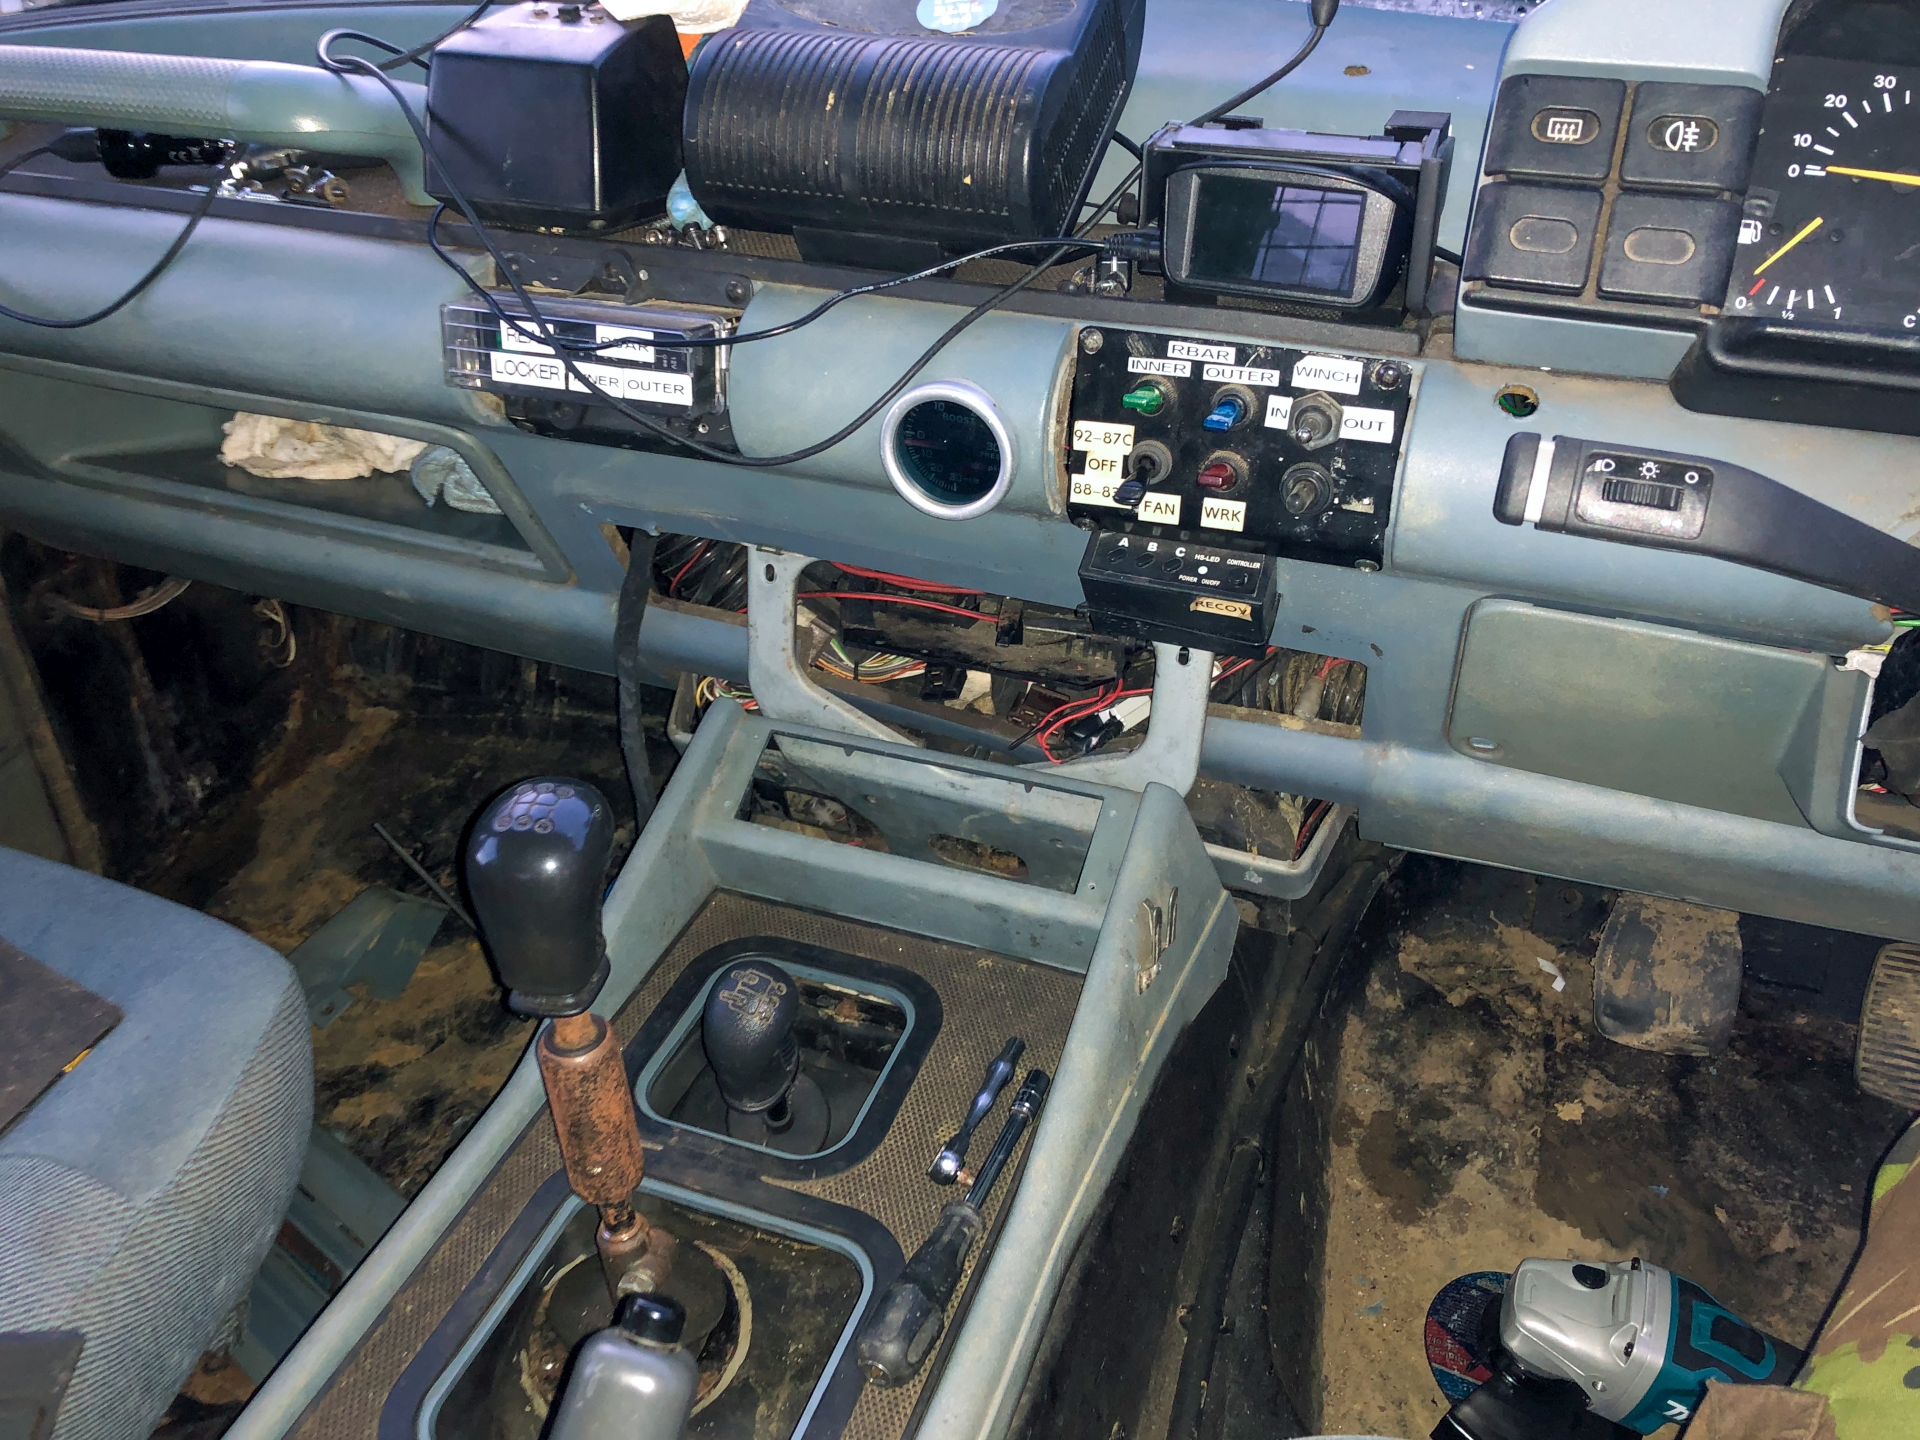
It was a mess with broken old plastic and was mostly taken up with the heater controls that did nothing. So I took those out and this is what it looked like:
The first goal is to make the centre console easy to remove. It started as the original once-part console that requires the cubby box to be emptied and removed, then the electric window/mirror panel to be removed, then the handbrake needed to be disconnected before the huge thing could be lifted free. I've previously needed access to the gearbox linkages from above and it's a ballache. So I sliced the console with my angle grinder in front of the cubby box. That still mounted solidly with four screws and the main console had three.
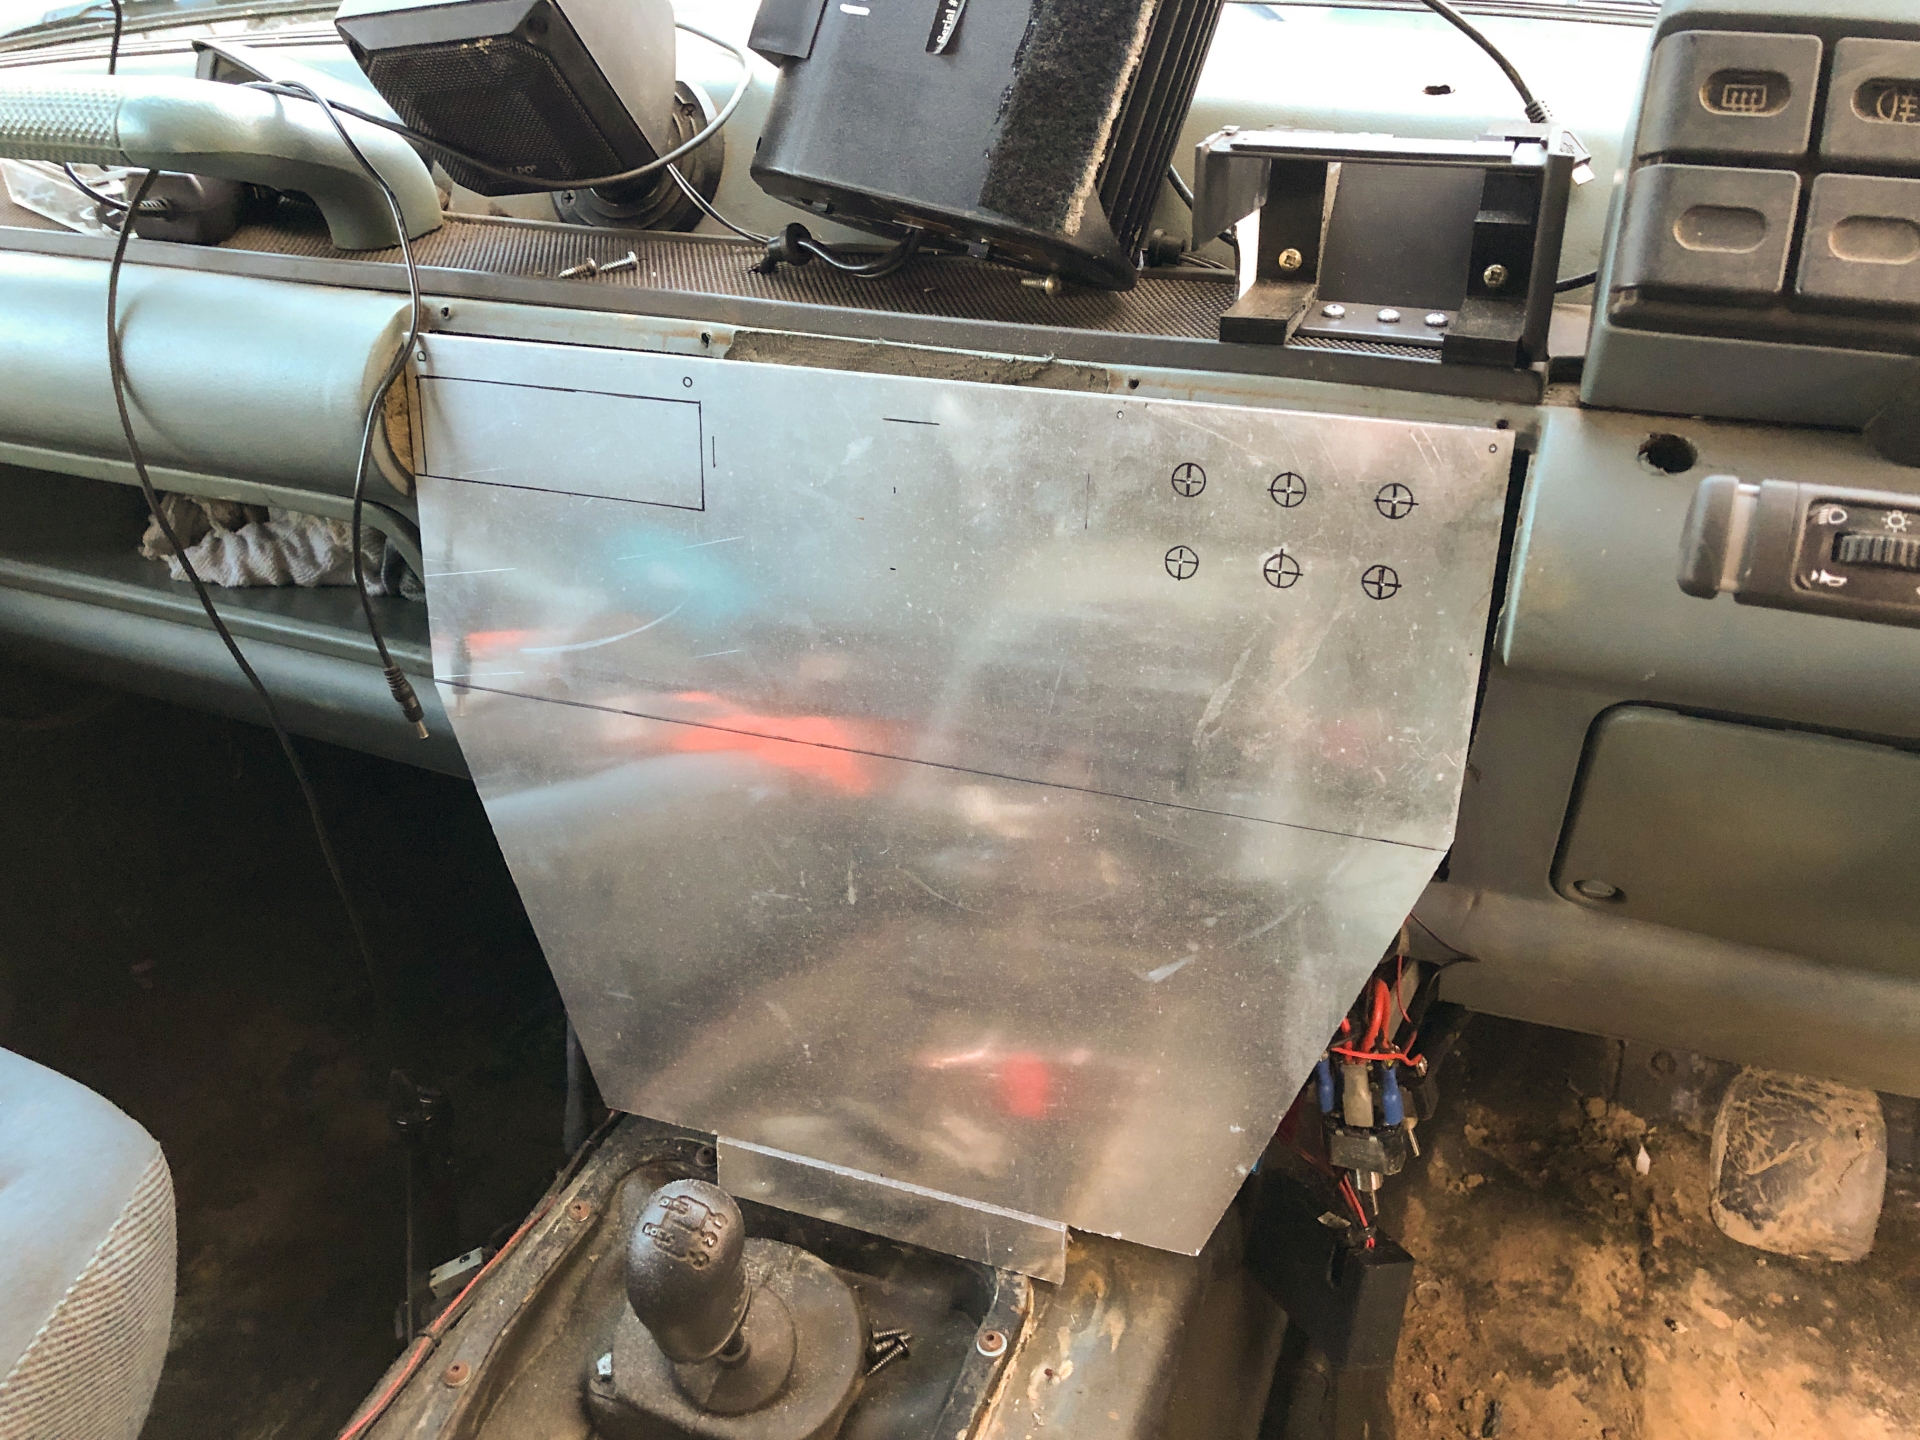
There was still a problem, the section at the front that would've originally housed the radio but now housed a switch panel for me hooks under the dash and it was still difficult to remove. So I chopped that off too and planned to make a whole new panel that would cover the entire centre of the dash, tidying it up while still keeping the bank of switches, relay panel and boost gauge in the same place and providing a new home for the switches on the panel. Maybe some high current isolators down the line for the winches too as I'd much rather have them inside than under the bonnet.
I drew the thing up in Illustrator.
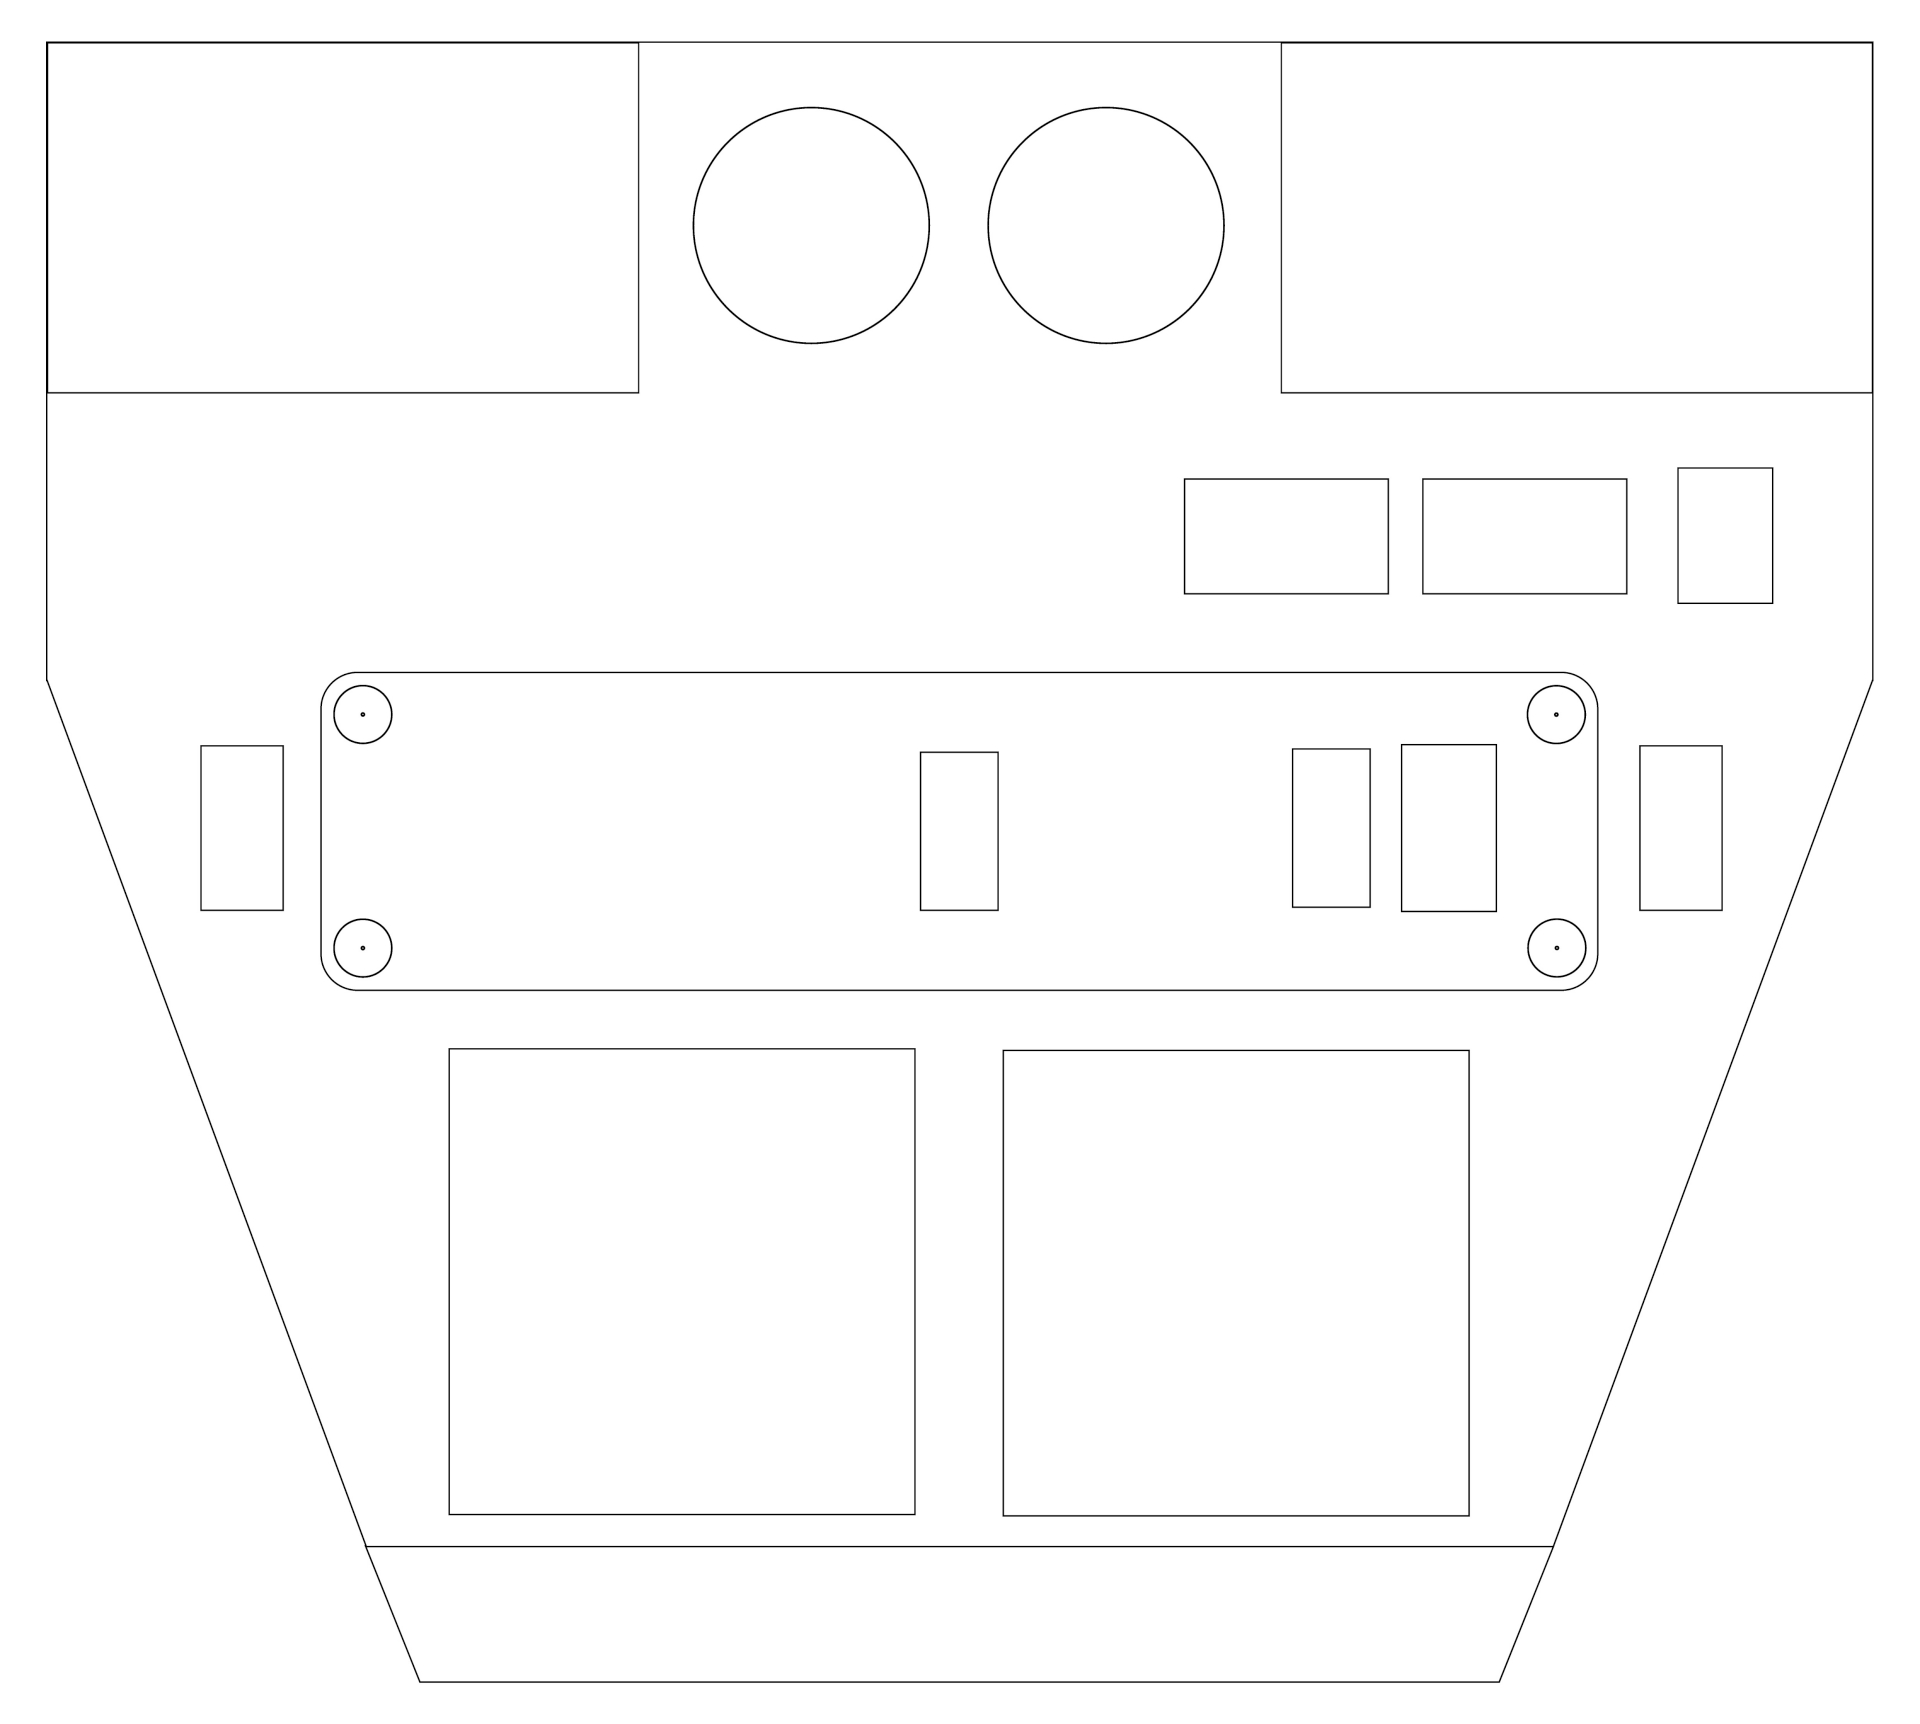
Electric window switches would also be moved forward to reduce the number of cables running down the centre console (it would be zero if I didn't have the CB radio as this old truck doesn't even have a handbrake switch. Cutouts for the relay panel and switches would be traced from the old panels along with the top mounting holes, the centre panel in the drawing is removable and is held on with screws and rivnuts so it can be taken off easily for adding new switches. Voltmeters go above this along with a switch to change between constant operation, ignition operation or off.
I started taking things apart and for reference I took pictures of the switches...
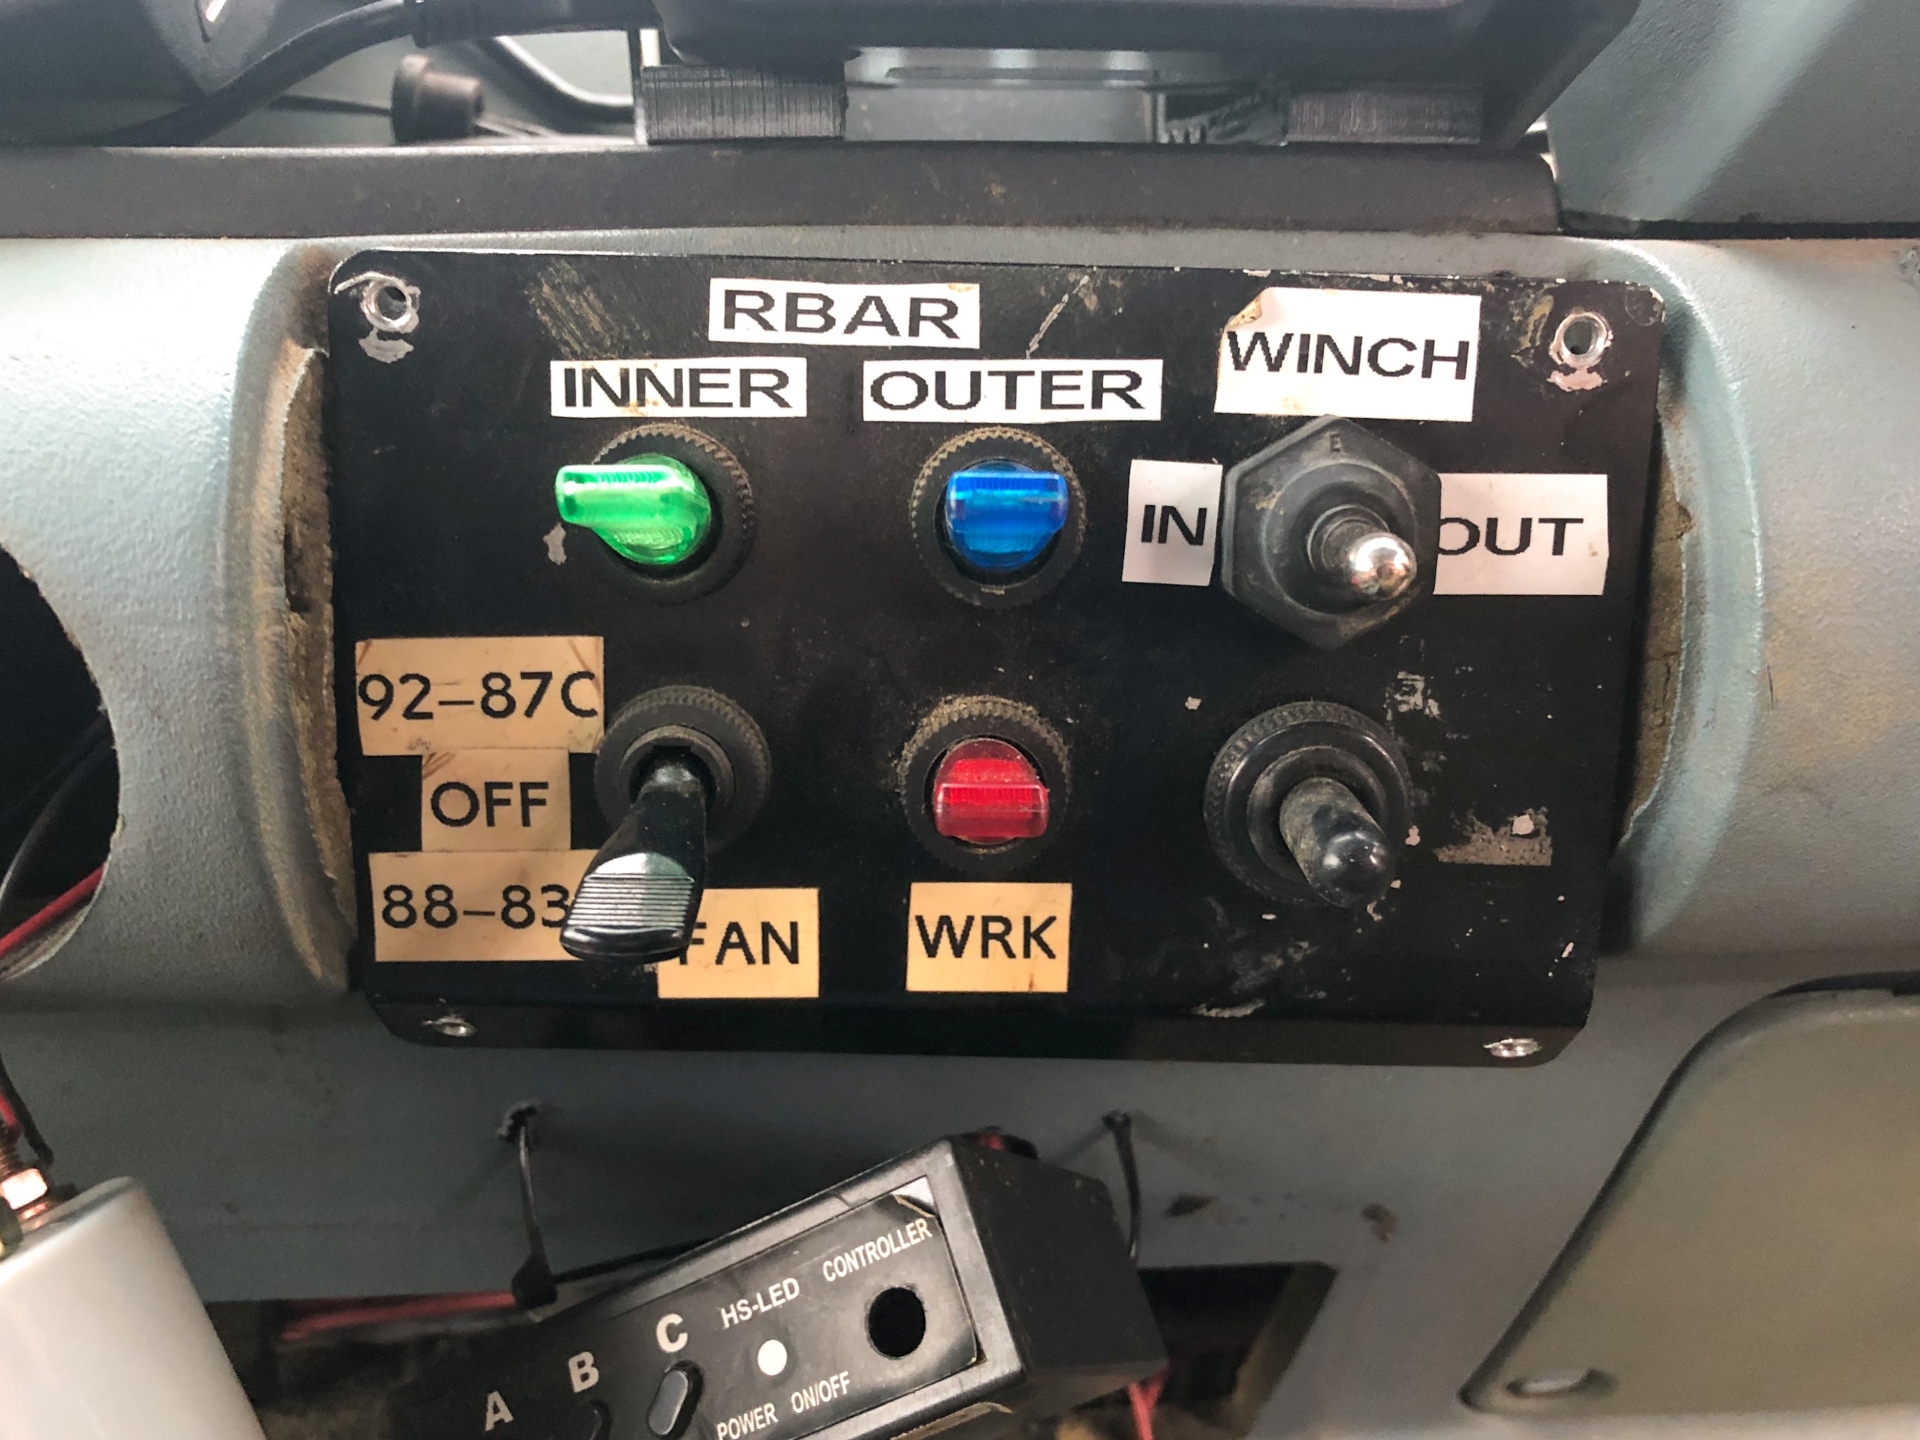
...before taking the old panel off. These will be directly replicated in the new panel.
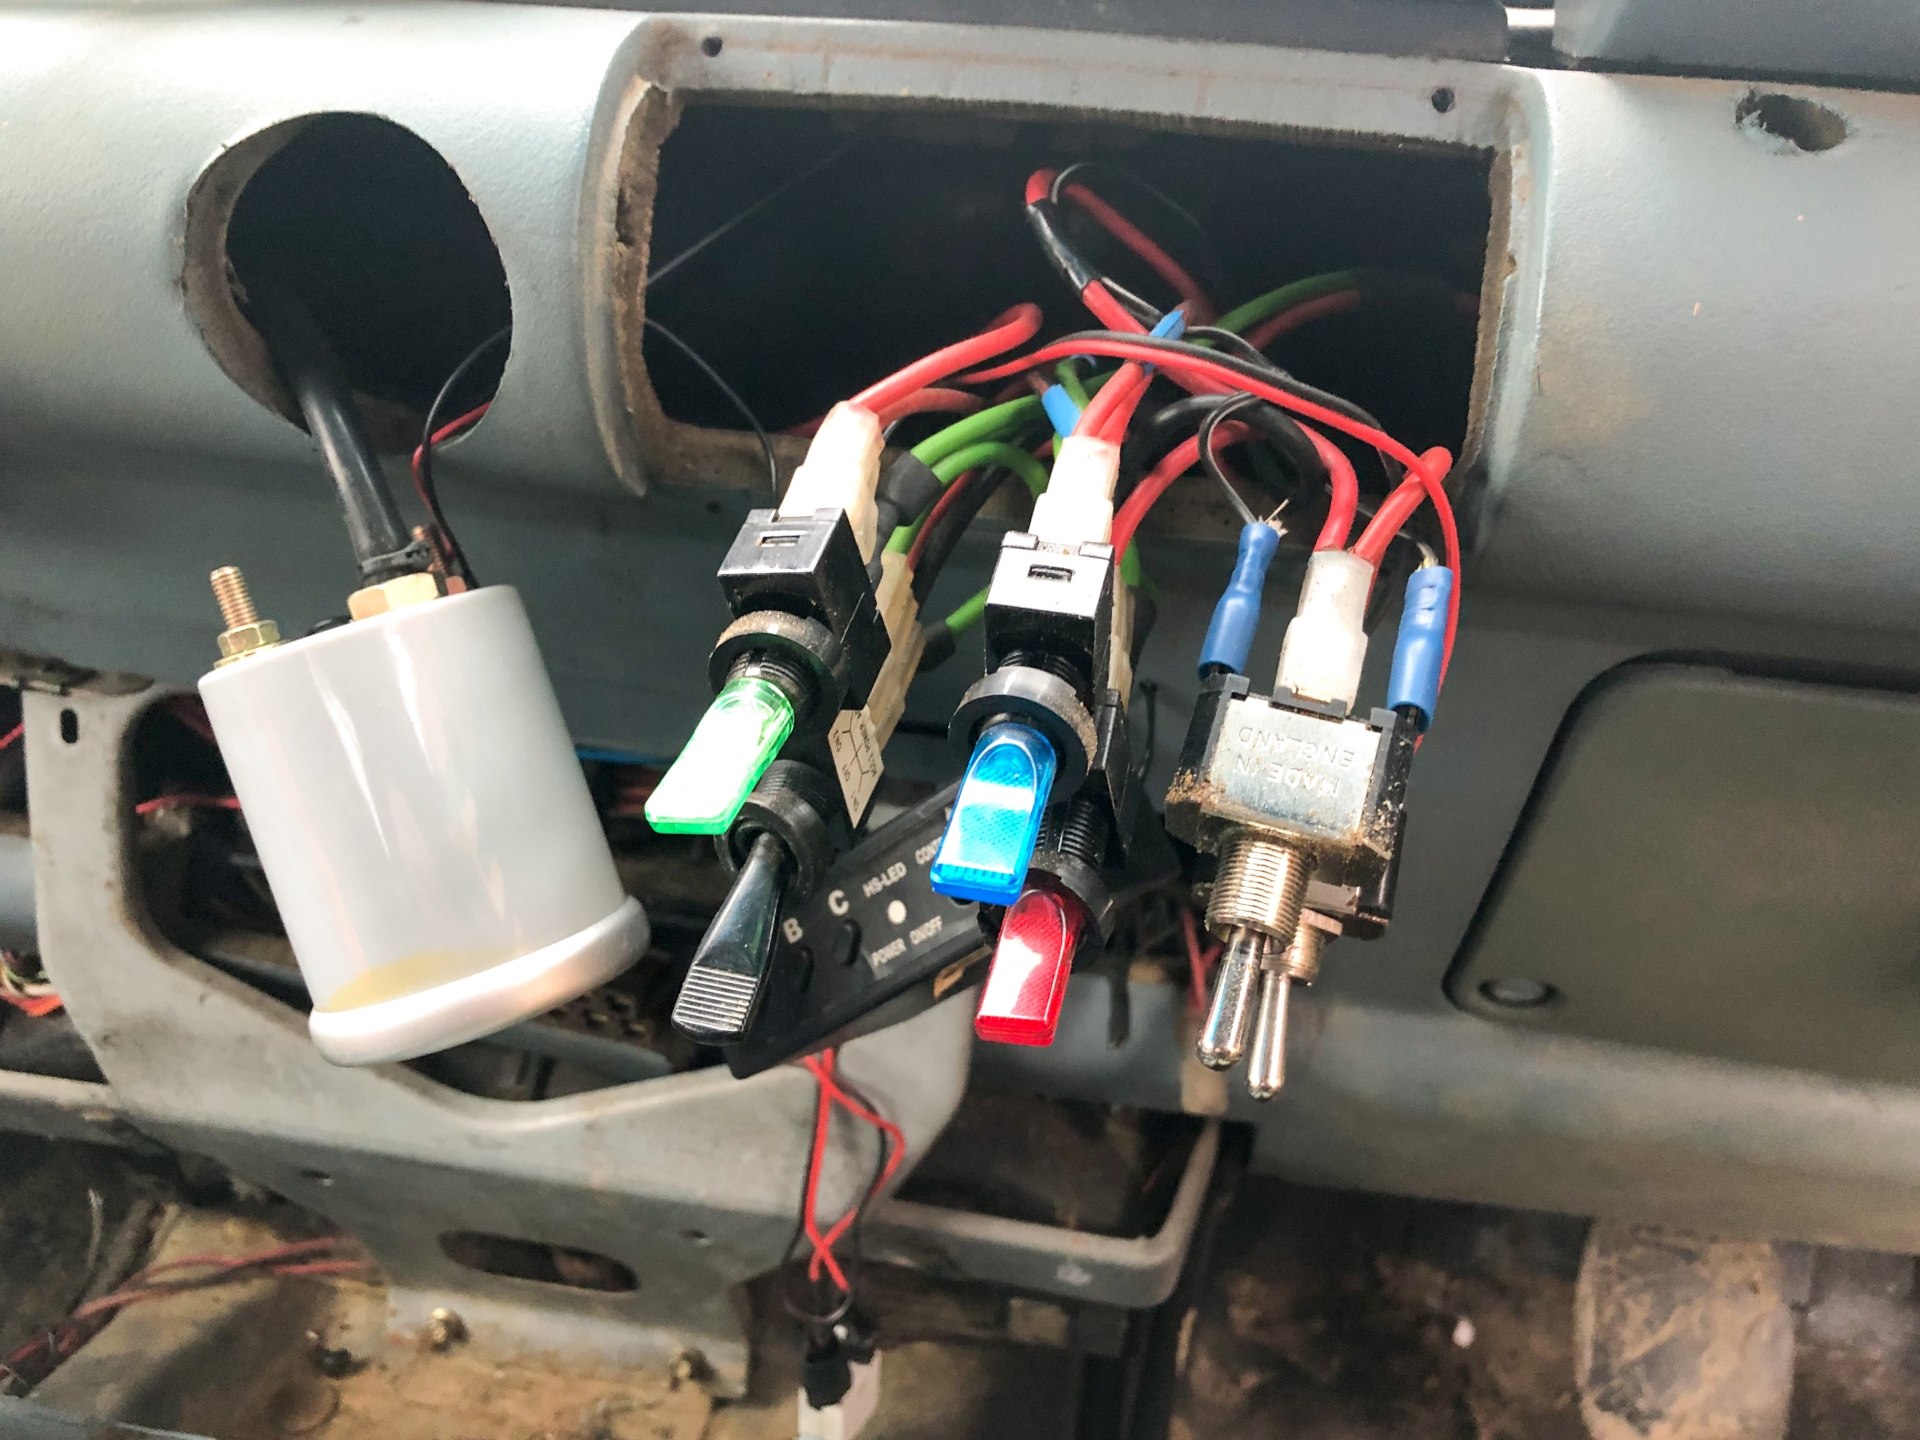
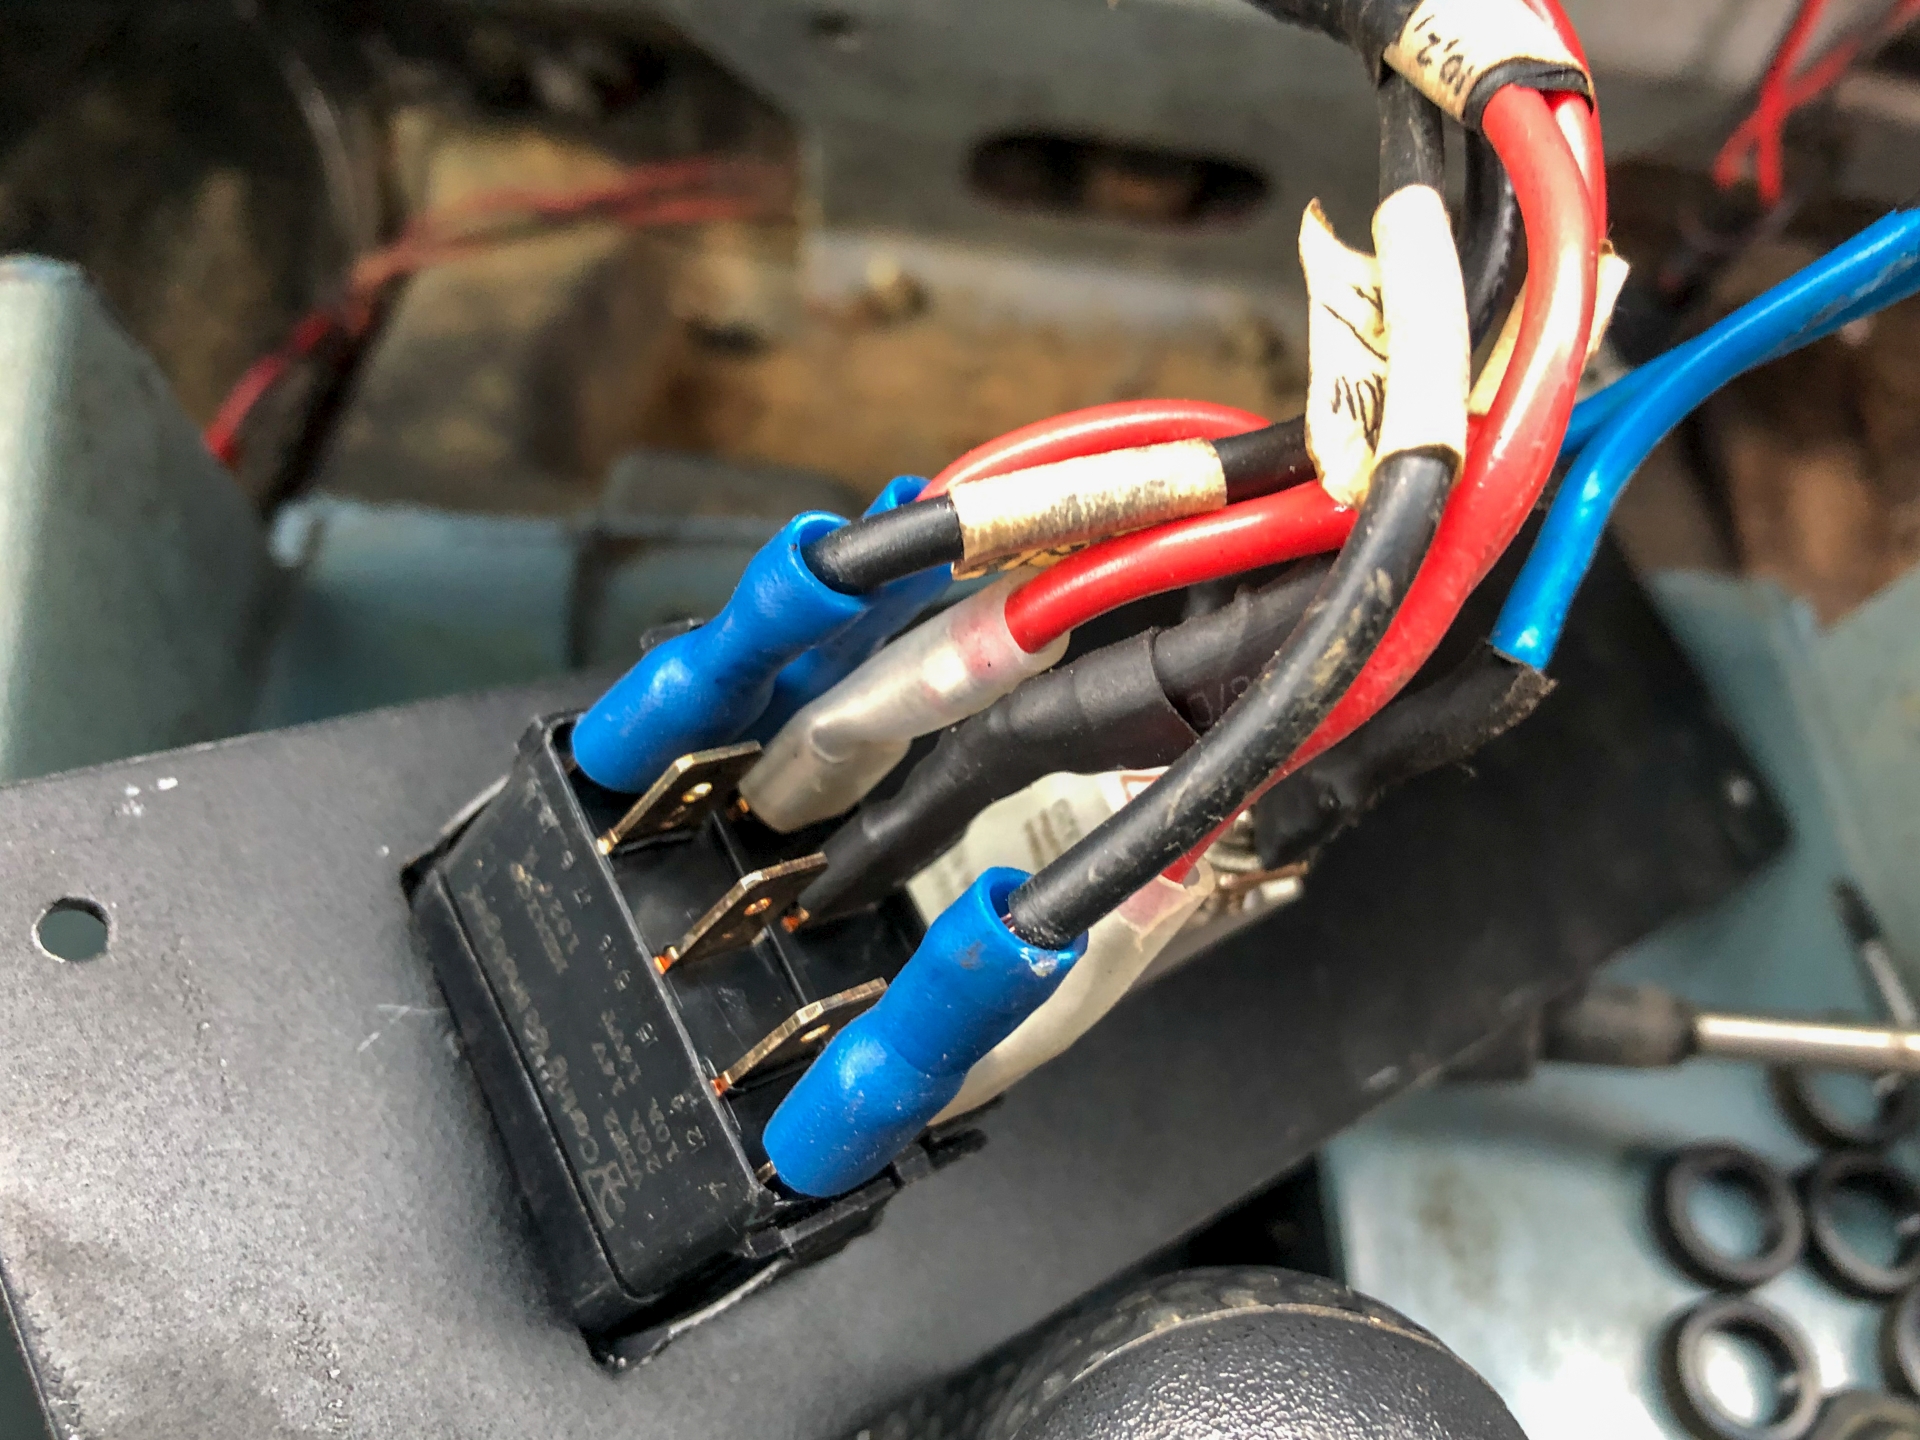
The lower panel was removed and photos of the wiring carefully taken. I have some nice block connectors for these switches but adding new crimp spade terminals seemed like too much of an effort for now...
Then the multi-tool vibrating saw thing came out and sliced up the dash. I wasn't sure about cutting up the original dash but it was already nasty and had holes cut in it.

The new panel was cut out of a spare sheet of aluminium, switch holes and folding point were marked on it. In hindsight this aluminium was too thick, it's either 4 or 5mm and was a pain to work with. It's very solid, though.
The completed dash, minus labels. The previous owner used push and pull circuit breakers as switches and while they worked well they were tiny and hard to use, so I replaced them with the two Carling circuit breakers in the centre panel. Much better. I underestimated how much of the panel the edging strip would cover so it touches the window switches, not a big deal.
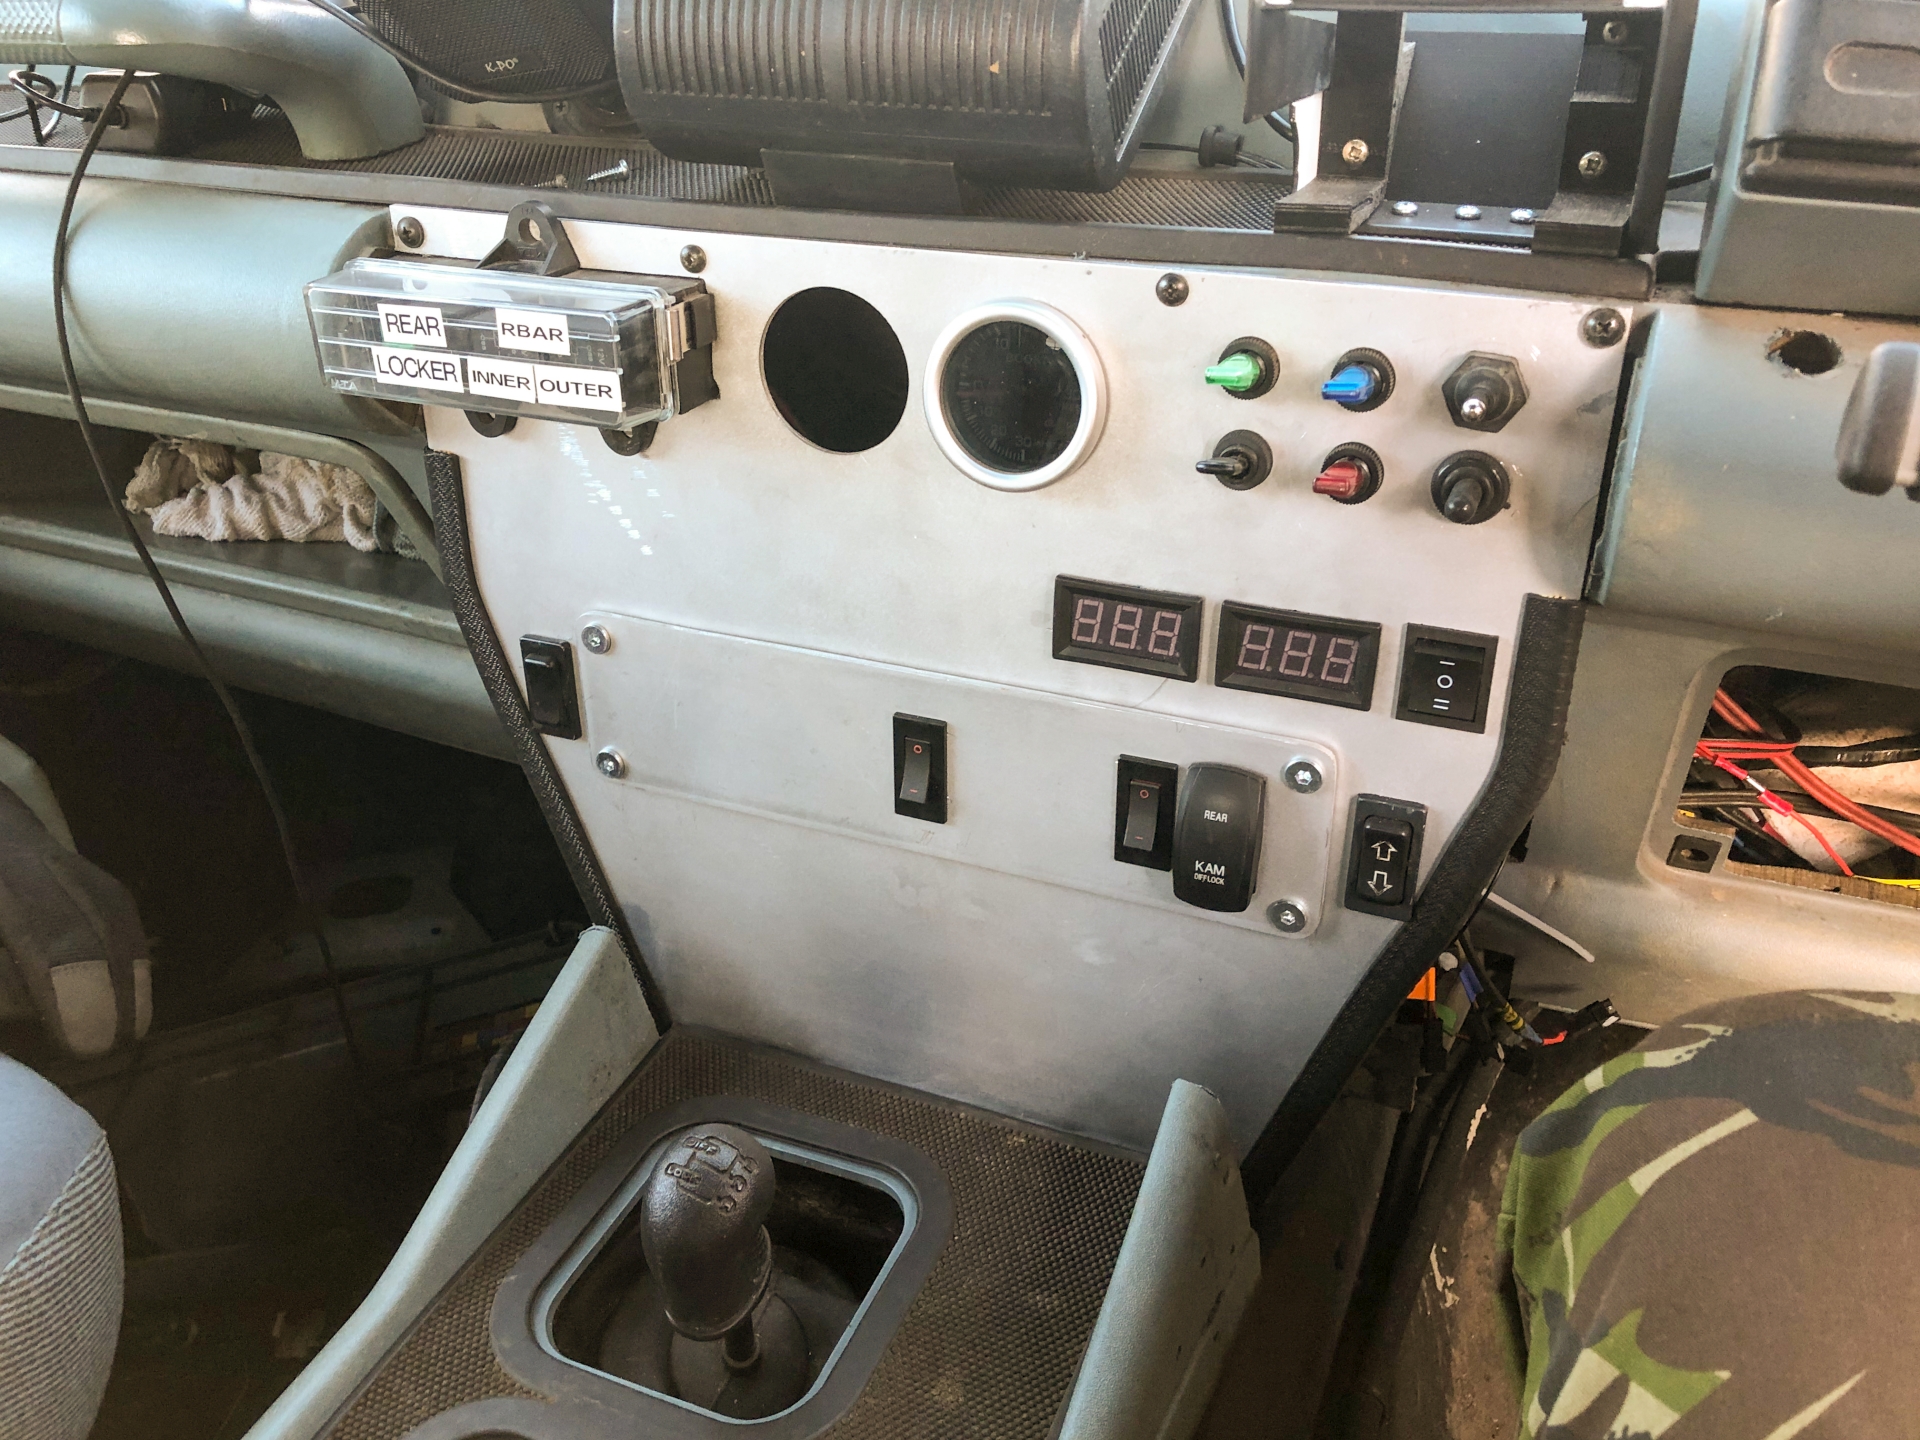
Labels added so I know what does what. Later I flipped the toggle switches upside-down to falling items (such as the interior mirror) didn't turn the lights on and drain the battery

This isn't the final form of the dashboard, the winch isolators are yet to be fitted.
Some changes were made during 2021 and the dash was completed in late 2022, as you can see in Part 2